
Introduction
SSH is a truly great and secure protocol. We all know we should be using it instead of telnet right. Right, but are you using all of its amazing abilities? Probably not is my guess, cause I wasn’t for quite some time. SSH on the ASA is a fairly simple affair configured the default way, with users, passwords and restricting ssh internet access to specific IP addresses. That works, it needs no real explanation. What does need explanation however is the use of SSH key pairs. Now when we talk about SSH, I’m talking about version 2. Version 1 has holes. Version 2 does not. Google it.
Certificate Creation
First step is to disable SSH v1 on your ASA
(config)#ssh version 2That was simple. Now take a look at the results:
sh ssh

ssh secure copy : ENABLED
Timeout: 60 minutes
Version allowed: 2
<subnet> 255.255.255.0 inside
Great, the first part is done. Now there are a great many SSH programs available but the one everyone knows and it is of course completely free, is PuTTY. You can get PuTTY here:
http://www.chiark.greenend.org.uk/~sgtatham/putty/download.html
I suggest on windows going with the installer for everything. To configure PuTTY to login with a username and password is easy but to use key pairs is slightly more involved. Firstly you need to generate a PuTTY key pair. To do this open PuTTYgen.
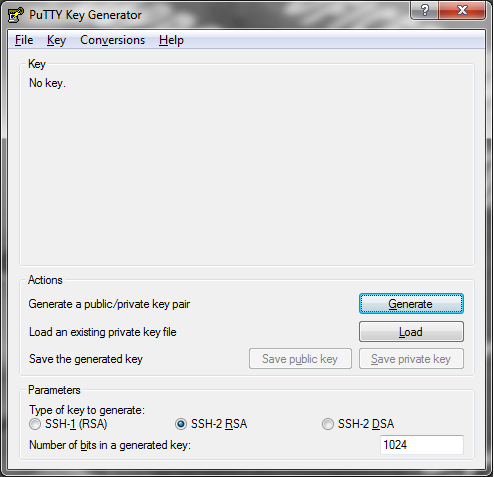
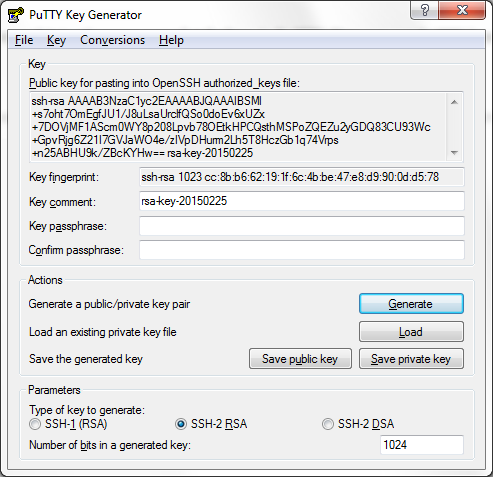
Generate the key as an SSH-2 RSA key pair. Now the default is 1024 bits in PuTTY, this can be safely doubled for increased security and all systems these days would cope without issue with a key this size. Now there are some options to create a comment, which you can use to track which PC the key is for. (I recommend a key pair per client device. e.g. use one key for each device you use to access routers, switches, servers etc.) There is also the option to configure a passphrase. This is an extra layer of security so if your private keys were compromised it would buy you some invaluable time to replace them. You just need to save the private key which contains both the public and private keys within it in a sensible location. You can also save the public key which is what you will use on the ASA or any other SSH server hosting device. The public key is public in that you can give it to any old weirdo and in itself is useless. The private key is private in that you should guard it with your life! (Not quite but don’t transfer it about, leave it on your PC only, this is why I mentioned to have a key per device)
ASA Configuration
Now for the ASA configuration. So the default setup for a user on the ASA is as follows:
username johndoe password ReA!!y@w3som3Pa££w07d!Now this password is no mean feat to remember although everyone is using password managers anyway, but still, inconvenient to have to keep entering it. You also need on the ASA the following command to make it use locally configured passwords for SSH sessions:
aaa authentication ssh console LOCALNow leave whatever you currently have in place while testing but this is the configuration you will need in addition to your configured password:
username johndoe attributes
 service-type admin
 ssh authentication publickey 0c:e5:46:bf:65:a2:d6:2a:73:57:08:65:4d:53:dd:0b:01:71:f1:87:a4:62:5a:11:02:50:d9:65:d0:8d:12:84 hashed
Now when you add the publickey, the ASA hashes the output as above because it is pretty long and a hash makes it vaguely human readable right. So the actual command is as follows, notice you need to be in username attribute mode to add the command:
username johndoe attributes
ssh authentication publickey <reallylongkey>
Now where do you get really long key from? That’s easy, you open up the public key you made already in notepad++. By default it looks like this:
---- BEGIN SSH2 PUBLIC KEY ----
Comment: "rsa-key-20150225"
AAAAB3NzaC1yc2EAAAABJQAAAIEAlCeDRLQnQW7UpdyAp5fZ8XmVgs3k4C794KFm
0tLvOn/Qhk9cI10AaraA2mXb0yIhfiP7KadcFQE8anAFlk+ifXg6cGWtwpRJ91c0
W2iPc8p8lO+W2o5Oq2djBSz/wbVXQL2jD/BAmxyyIK0/lMQsxJ94c93cI8Xbznnb
UGCUcz8=
---- END SSH2 PUBLIC KEY ----
You actually only need however the characters all in a big line. Copy from AAA***to***z8= into another tab and make it all on one line like so:
AAAAB3NzaC1yc2EAAAABJQAAAIEAlCeDRLQnQW7UpdyAp5fZ8XmVgs3k4C794KFm0tLvOn/Qhk9cI10AaraA2mXb0yIhfiP7KadcFQE8anAFlk+ifXg6cGWtwpRJ91c0W2iPc8p8lO+W2o5Oq2djBSz/wbVXQL2jD/BAmxyyIK0/lMQsxJ94c93cI8XbznnbUGCUcz8=This is what you will now paste into your ASA as the <reallylongkey>
ASA configuration is complete so far.
PuTTY Configuration
Now PuTTY needs some minor changes to make it work.
- Configure your device as standard (hostname or IP address, SSH port if non standard)
- Configure your private key file in PuTTY for this connection or as the default connection from your PC. Its under \Connection\SSH\Auth in the PuTTY configuration categories.
Now when you connect it will say the following in the PuTTY window:
Authenticating with public key <"Your key Comment">It will also say:
Passphrase for key "rsa-key-20150225":Which is where you enter the passphrase you configured on the keypair. This passphrase is what is used to buy some time if someone accesses your SSH keys. The way to avoid inputting this passphrase for every device is using the PuTTY authentication agent or pageant. Open pageant and add your key. This is where you show pageant where your private key is located and what the passphrase is. Now you can connect to multiple devices without ever having to put in a password or passphrase at all for your user account! Nice.
Bear in mind you will still need the enable password on connection as this guide assumes you are not using TACACS+ but local authentication only.
Cleaning up
Now to turn off local passwords on the ASA is by removing this line:
(config)#no aaa authentication ssh console LOCALI do warn you though to make sure all is tested and working before doing so with multiple SSH sessions to ensure the certs are working. You can also enable debugging on the ASA to view the connection as it is being made from your device. I also recommend more than one account.
(config)#debug ssh 10Don’t go higher than 10 otherwise you’ll end up with so much rubbish spewing out in the windows you will see nothing. As always to stop debugging type:
(config)#un all